Step 2: Creating a MediaConnect Distribution Flow
Let’s start creating a MediaConnect distribution flows. The source for this distribution flow will be the program output of the switcher EC2 instance.
In order to minimize cross-AZ traffic, we will choose the same AZ for our signal path. In this example we will choose us-west-2a.
-
Search for MediaConnect in the search bar and enter into MediaConnect Console.

MediaConnect Contribution Flow
-
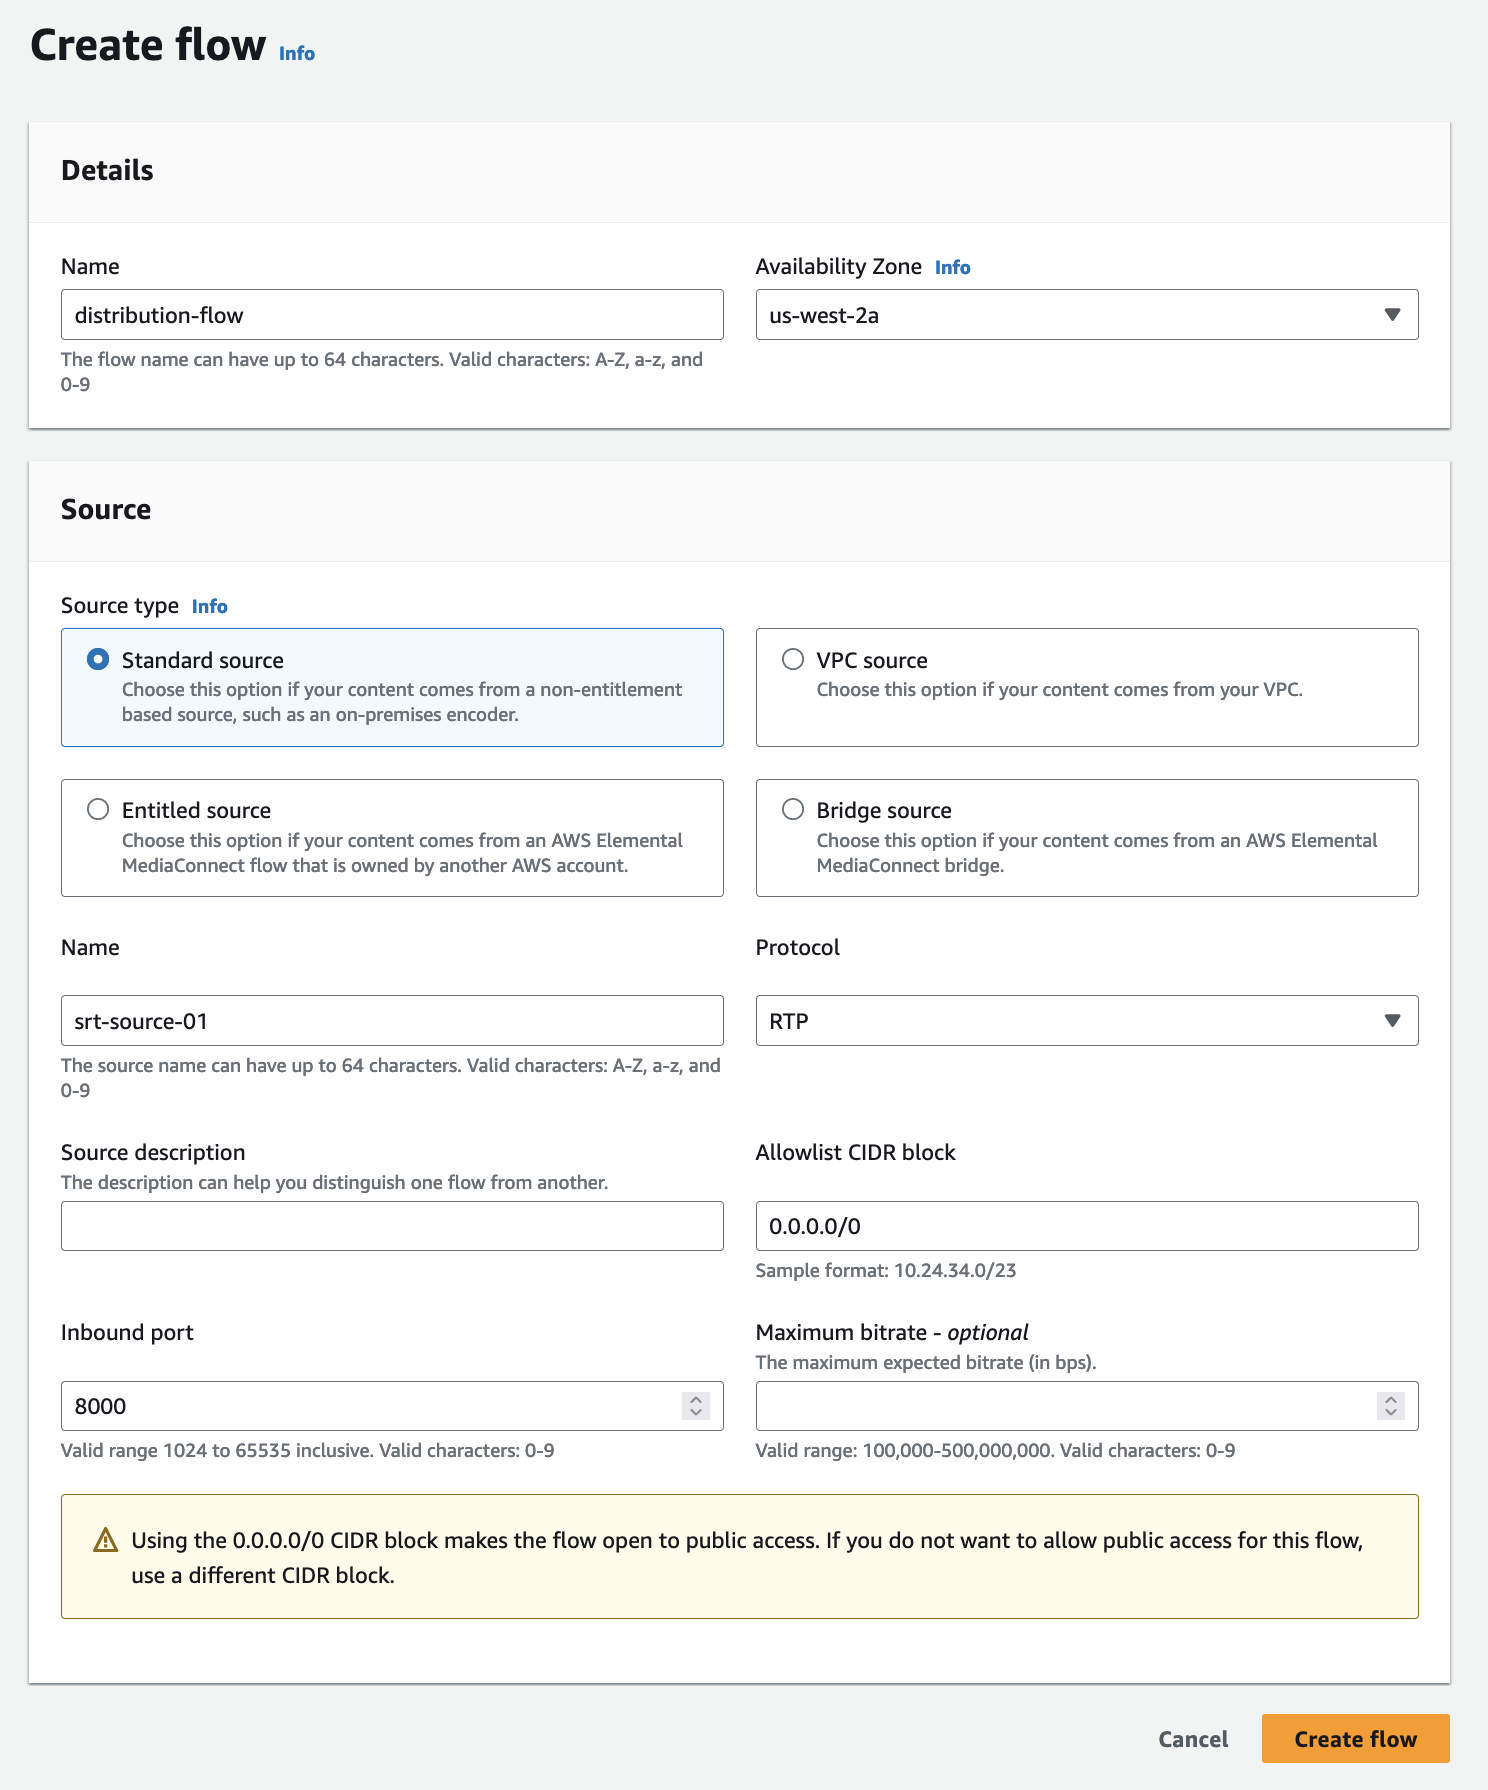
Click on Create Flow.
-
Add a Name for the Flow. In this example,
distribution-flow.Choose an Availability Zone for our signal path. Make sure to use the same one as the EC2 instance previously created.
Add a Name for the Source of the flow. In this example,
srt-source-01.Define the Protocol: RTP (we will update this later to SRT once we have a VPC Interface).
Allowlist CIDR block
0.0.0.0/0.Define the Inbound port:
8000.Click Create Flow
-
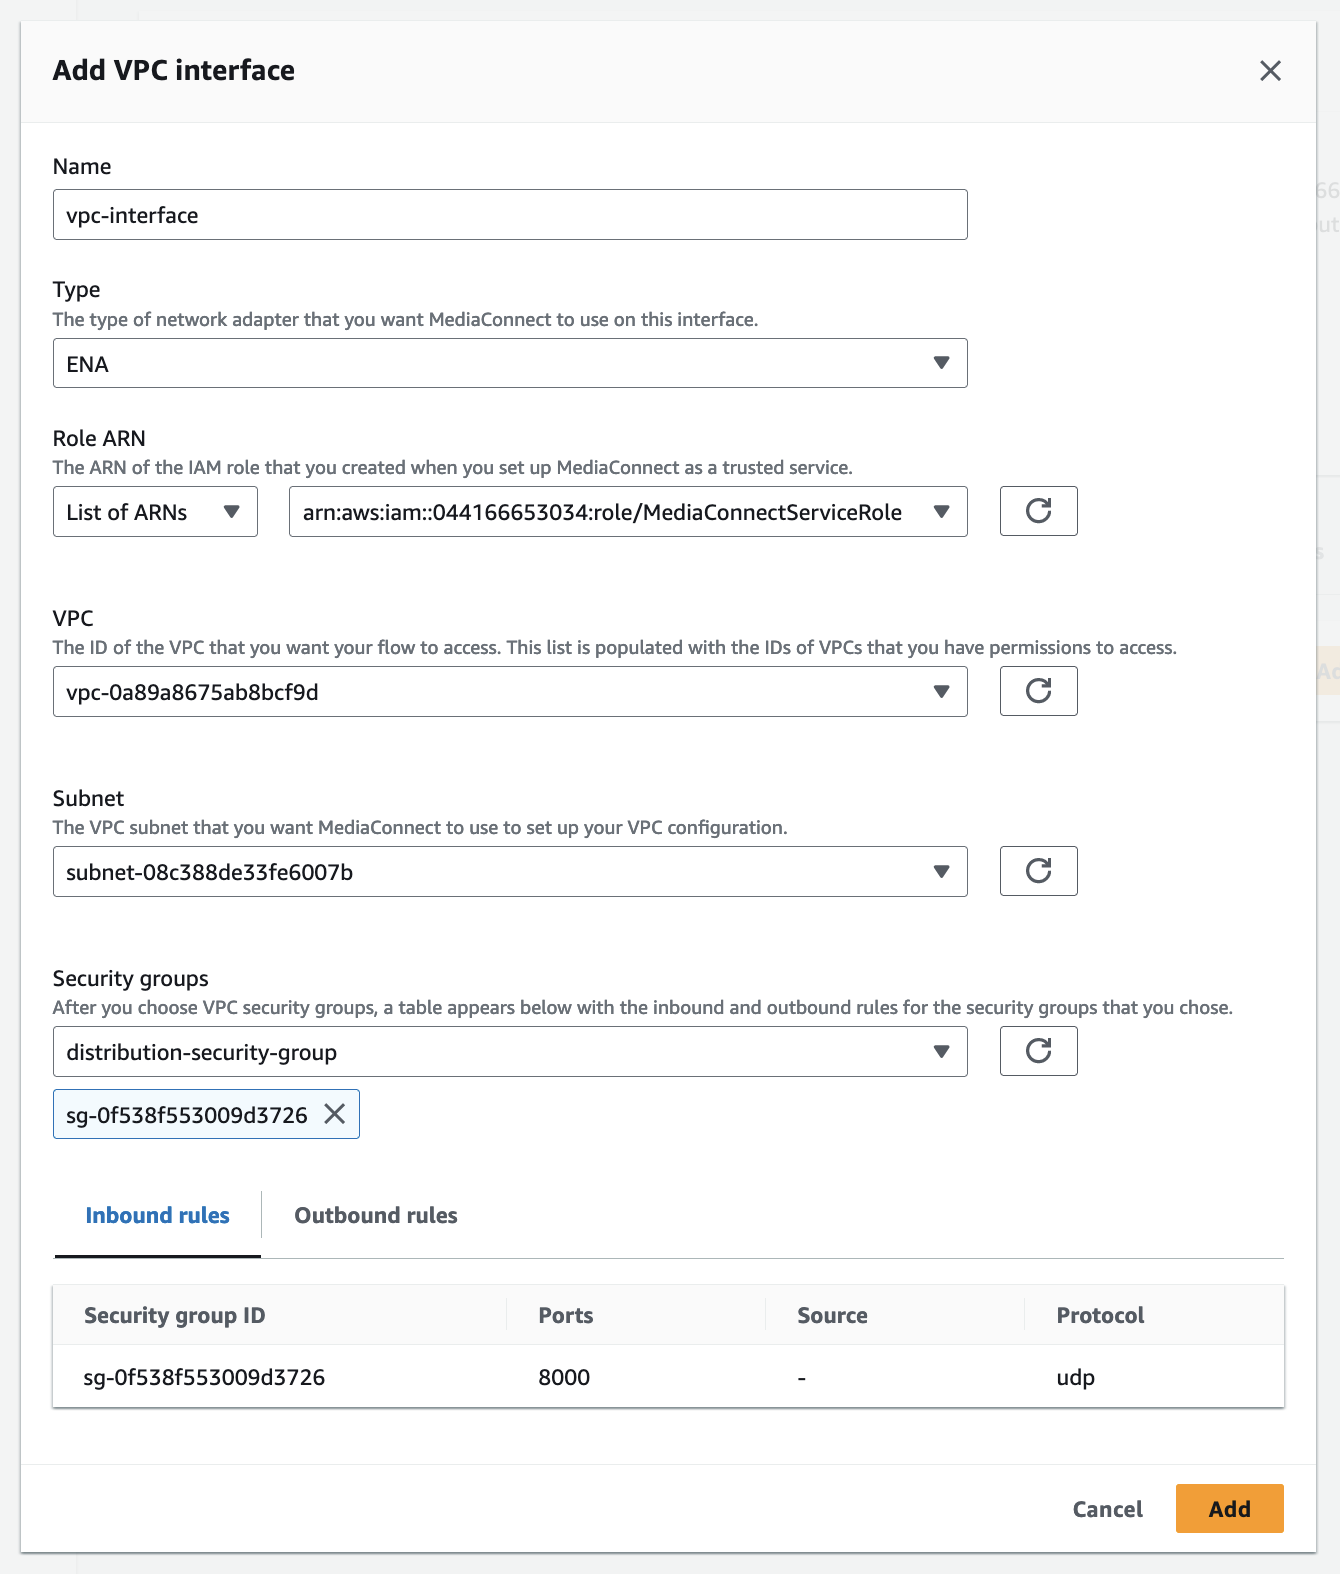
In order for our switcher EC2 instance to communicate with our distribution mediaconnect flow within our VPC, we need to create a VPC Interface. Select the VPC intefaces tab and click Add VPC interface.

-
Under Name, type in
vpc-interfaceUnder Role ARN select the
MediaConnectServiceRolewe created earlier.Under VPC select the default VPC.
Under Subnet, select the only subnet listed that corresponds to the
us-west-2aAZ.Under Security groups, select the
distribution-security-groupwe created earlier.Now click Add.
You should now see the newly created
vpc-interfacelisted under the VPC interfaces tab.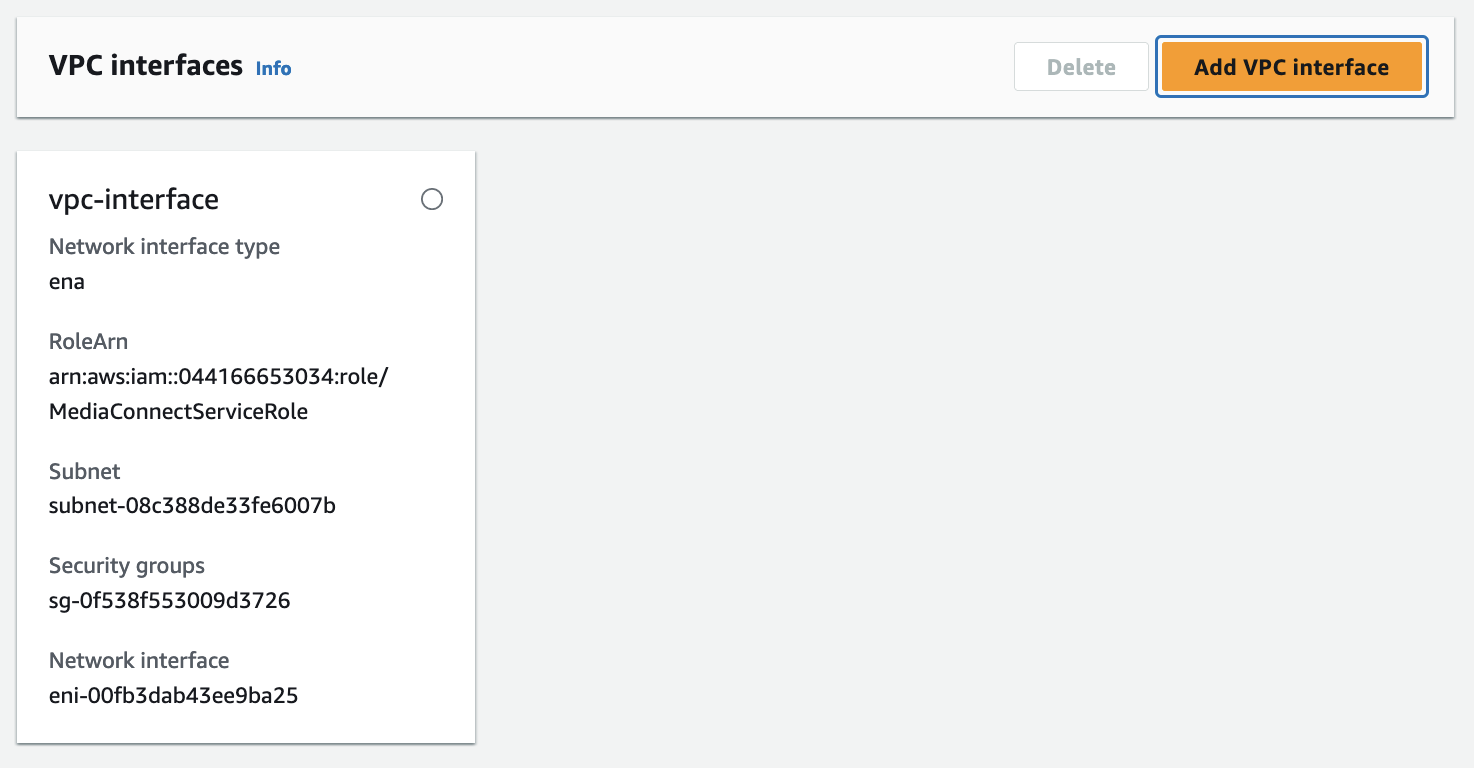
-
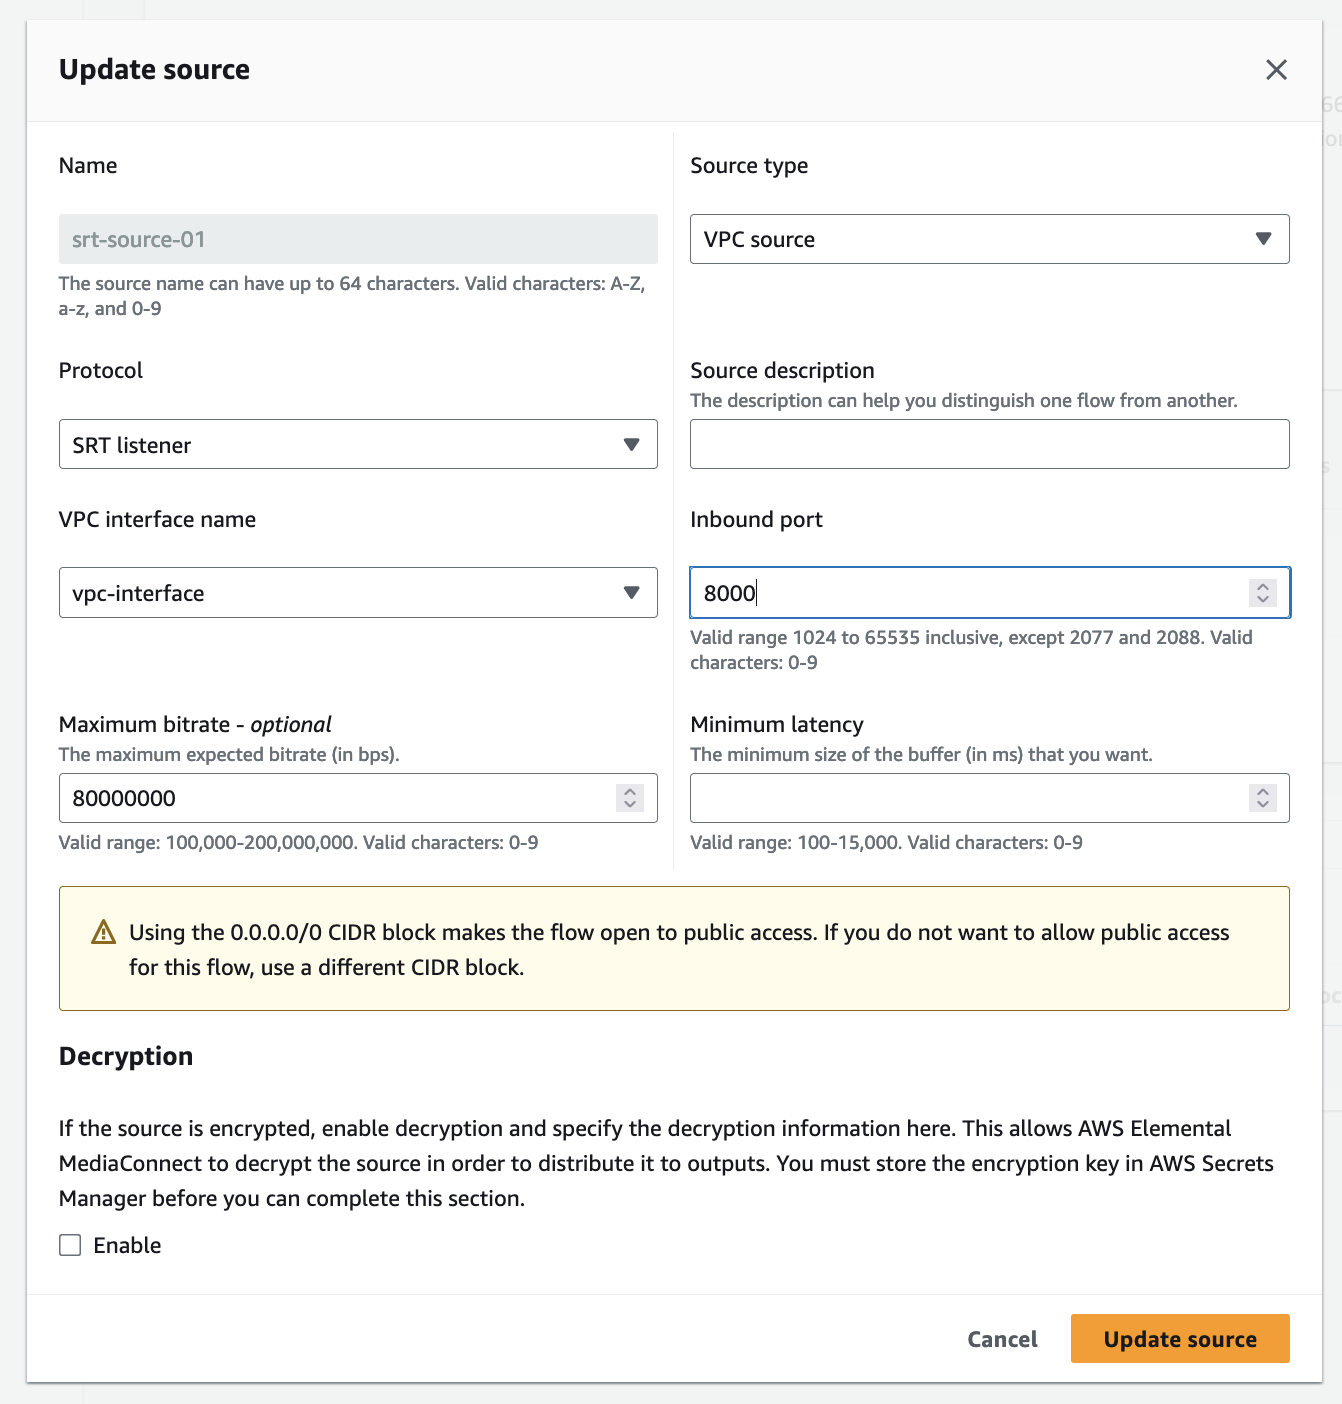
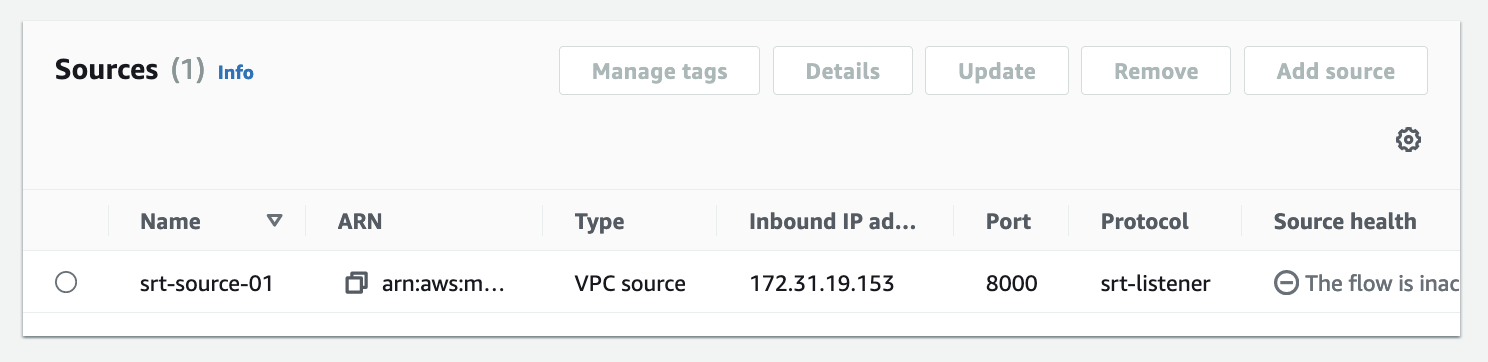
Now click the Sources tab and select the
srt-source-01and click Update.
Update the source with the following information.
Under Source type, select VPC source.
Under Protocol, select SRT listener.
Under VPC interface name, select
vpc-interface.Then click Update source.
Take note of the Inbound IP address. You will need this to configure the switcher.
-
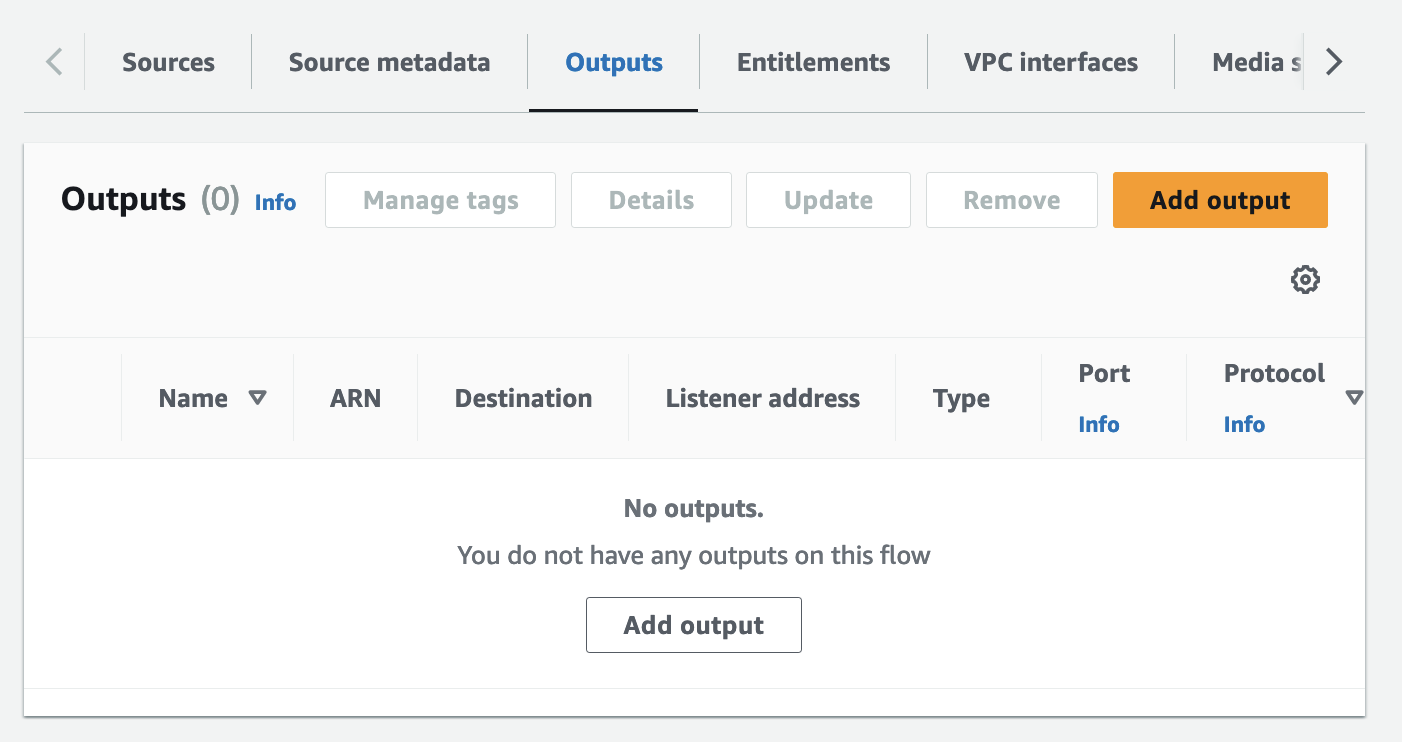
Now in order to direct the output of the Distribution flow to the workshop destination, we need to click the Outputs tab and click Add output.
-
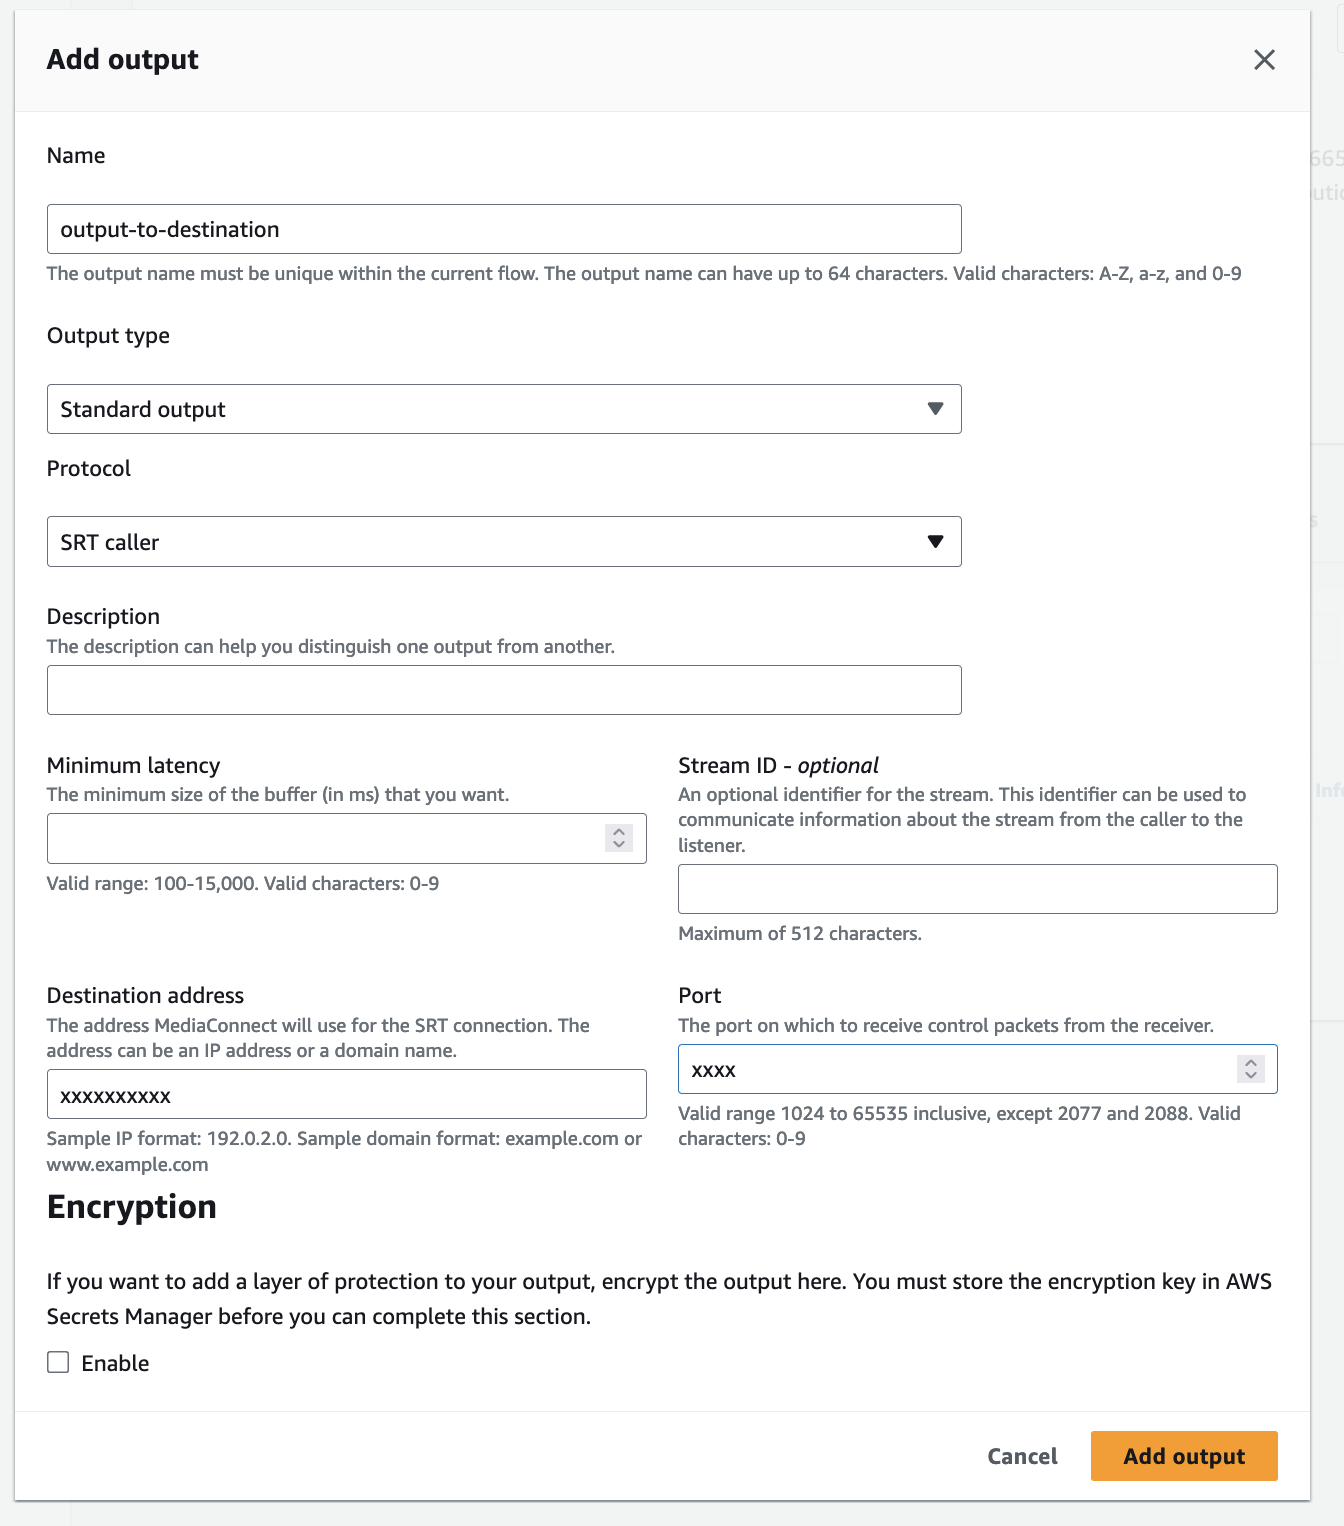
In the Add output form, fill in the following information.
Under Name, type
output-to-destination.Under Output type, select Standard output.
Under Protocol, select SRT caller.
Under Destination address, type in the public IP provided by the workshop host..
Under Port, type in the port provided by the workshop host.
Then click Add output.
-
Click Start to start the distribution Flow.

Let’s jump into the next session and configure our switcher EC2 Channels.